Build Your Own Wooden Podium: A DIY Guide for Schools, Churches, and Offices
Hey there! So you're thinking about building a wooden podium? That's awesome! Whether you need one for your school's awards ceremony, your church's announcements, or your office's presentations, building your own is a rewarding project that can save you a bunch of money. And let’s be honest, a handmade podium has a certain charm that store-bought ones just can't match.
This guide will walk you through the process step-by-step, offering tips and tricks along the way. Even if you're a beginner with woodworking, you can totally tackle this. Let’s get started!

Choosing Your Wood and Tools
Picking the Perfect Wood
The type of wood you choose will affect the look, durability, and cost of your podium. Here are a few popular options:
- Pine: A budget-friendly choice, pine is relatively soft and easy to work with. It takes stain well, but might dent more easily than harder woods.
- Oak: A classic and sturdy option, oak is known for its strength and beautiful grain. It's more expensive than pine but will last for years.
- Maple: Another strong and beautiful hardwood, maple is known for its smooth, even grain. It can be a bit more challenging to work with than pine, but the results are worth it.
- Birch: A good compromise between cost and durability. Birch is relatively strong and takes stain well.
Consider the overall aesthetic you're aiming for. A rustic look might suit pine beautifully, while a more formal setting could benefit from the elegance of oak or maple.
Gathering Your Tools
Before you start, make sure you have all the necessary tools. Don't worry, you probably have some of these already! Here's a list:
- Measuring Tape & Pencil: Accuracy is key!
- Saw (Circular Saw or Miter Saw): For cutting the wood to size. A miter saw gives cleaner cuts for mitered corners.
- Drill and Drill Bits: For pilot holes and screwing things together.
- Screwdriver (or impact driver): To drive in the screws.
- Wood Glue: For added strength and stability.
- Clamps: To hold the pieces together while the glue dries.
- Sandpaper (various grits): For smoothing out rough edges and surfaces.
- Wood Stain or Paint (optional): To finish your podium and give it the desired color.
- Safety Glasses & Dust Mask: Always prioritize safety!
Designing Your Podium
Now for the fun part â€" designing your podium! You can find plenty of free plans online, but it’s also great to customize it to your needs and preferences. Consider these factors:
Size and Dimensions
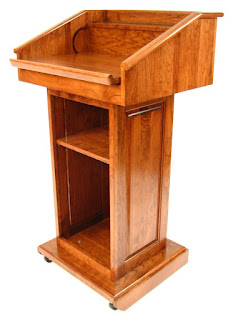
How tall should your podium be? This will depend on the height of the people who will be using it. A good starting point is around 40-42 inches tall, but adjust this to suit your needs. The width and depth are also important; a 24-inch wide and 18-inch deep top is a comfortable size for most.
Style and Features
Do you want a simple, rectangular podium, or something more elaborate? You could add features like:
- A slanted lectern top: Makes it easier to read notes.
- A small shelf underneath: For storing notes or a microphone.
- Molding or trim: To add decorative detail.
- Wheels (optional): For easy mobility.
Sketch out your design on paper before you start cutting. This will help you visualize the final product and ensure you have all the necessary materials.
Building Your Podium: A Step-by-Step Guide
Once you have your design finalized and your materials ready, it's time to get building! This is a general guide, adapt it to your specific design.
Cutting the Wood
Carefully cut all the pieces of wood according to your plan. Remember to always measure twice and cut once! Use a sharp saw for clean, accurate cuts. A miter saw is ideal for angled cuts if your design involves them.
Assembling the Base
Assemble the base of your podium according to your design. This typically involves attaching the legs to the bottom support structure. Use wood glue and screws for a strong and secure joint. Make sure everything is square and level before the glue dries.
Attaching the Top
Once the base is secure, attach the top. If you’re creating a slanted lectern, make sure the angle is consistent and secure. Use the same wood glue and screw method for added strength.
Sanding and Finishing
Once the podium is assembled, sand all surfaces smooth using different grits of sandpaper, starting with coarser grit and moving to finer grit for a perfectly smooth finish. Then, apply your chosen wood stain or paint. Follow the manufacturer’s instructions for drying time.
Finishing Touches and Tips
Adding those finishing touches will make all the difference! Consider:
- Applying a sealant: This will protect the wood from scratches and spills.
- Adding felt pads to the bottom: To protect floors and prevent scratching.
- Installing a microphone clip (if needed): Make sure it's securely attached.
Remember to take your time and enjoy the process! Building a wooden podium is a rewarding experience, and you'll have a beautiful, functional piece at the end.
Commonly Asked Questions
Q: What’s the best type of wood for a podium?
A: It depends on your budget and desired aesthetic. Pine is budget-friendly and easy to work with, while oak and maple offer more durability and a nicer look.
Q: How long does it take to build a wooden podium?
A: This varies depending on the complexity of your design and your woodworking experience. A simple podium might take a weekend, while a more intricate design could take longer.
Q: Can I build a podium without any woodworking experience?
A: Yes! Start with a simple design and take your time. There are plenty of resources available online, including videos and tutorials, to help guide you through the process.
Q: How much will it cost to build a wooden podium?
A: The cost will depend on the type and amount of wood you use, as well as the tools you already own. You can likely build a podium for significantly less than buying a pre-made one.
Q: What if I make a mistake?
A: Don’t worry, everyone makes mistakes! Woodworking is a learning process. If you make a mistake, try to fix it, or consider redesigning a portion of your project. It's all part of the learning experience.
Happy building!


No comments:
Post a Comment